Computer info

What is knowledge if you will not share it.

Wednesday, November 24, 2010

Steps to Install Antivirus on Your Computer


Install Anti-virus

STEP 1: Download the anti-virus and double-click on the file to launch the installation of Avast anti-virus. Click "Next" on the appeared screen.

STEP2: Another windows with Read-Me file will appear, just click "Next" again.

STEP 3: Legal agreement would appear, click "I agree", and then click "Next" to continue.

STEP 4: I recommend you to use "Typical" installation. Ensure that "Typical" has been selected by you and then click "Next".

STEP 5: A message asking you to schedule a boot-time anti-virus scan of your local hard drive would appear. I recommend you to select No, because this scan could take a lot of time.

STEP 6: Once the setup process has been finished, restart your computer. Select Restart and click Finish.

STEP 7: After you will restart your computer, two new icons in the bottom of the right corner of the screen would appear. The icon with "I" is the "Virus Recovery Database" (VRDB). It makes the copies of the programs installed by you and if one of them gets infected with a virus, this will help in replacing the infected file so that the program functions properly. However, the icon with "A" is the On-Access Protection.

Note: After restarting your computer, right-click on icon with "A" in the task bar and select "Updating".

To install anti-virus is a necessity, nowadays. But taking some precautionary measures can prevent virus invasion.

1. You can install a firewall to protect your computer when connected to Internet.
2. Don’t open suspicious attachments.
3. Always keep your anti-virus software up-to-date by installing latest updates.
4. Download programs only from authentic websites.
5. Make sure that you have read all security warnings, license agreements, and privacy statements associated with any software you want to download.

In case you are unable to repair your computer against virus infection, you can avail enhanced tech support services from various technical firms to make your computer free of malicious software.

How to Assemble a Computer


While buying a computer that is fully assembled may have its advantages in the short term, such as a slightly lower price, assembling a computer from after-market components may be more desirable for many reasons. All of the parts that go into a machine you assemble yourself can be hand-picked to ensure they are exactly what you need. Performance-robbing components, such as on-board graphics and sound, can be entirely eliminated from the machine. In addition, because each subsystem can be upgraded independently, older components can be replaced by components with the latest technology, allowing you to keep the machine much longer.


Step 1: Get Organized
Gather all of your components and lay them out in an organized fashion. Make sure you have the tools required--generally, you'll need at least a phillips screwdriver and possiby a torx driver (depending on your case hardware).

Ensure that you take precautions to prevent electrostatic damage to your PC's components. Ground yourself before touching any sensitive equipment. Always handle components by their edges. Avoid touching any contacts or metallic surfaces.

Step 2: Configure Computer Case

Step 3: Install CPU/Processor

Step 4: Install Memory (RAM)

Step 5: Prepare/Install Motherboard

Step 6: Install Hard Drives and CD/DVD Drives

Step 7: Install Video Card

Step 8: Install Accessories

Step 9: Initial Power-up

Step 10: BIOS Settings

Step 11: Install Operating System

Set Up your computer network with a few simple steps


Here are the 4 things you need to do to get you up and running fast

The steps are:

1. prepare all the parts that you need
2. set up your router
3. connect a network client such as a computer or printer
4. do the software set up of the client

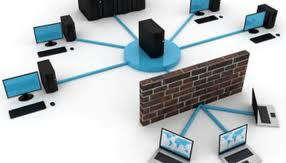
1. Prepare all the parts that you need - Make sure that you have purchased broadband Internet either from a DSL provider such as Verizon or from a cable provider such as Cablevision. You need to have received a modem from them and it needs to be connected to a DSL phone line or a cable line which was provided by your ISP (Internet service provider). You should have a router made by Linksys, Netgear, D-Link, Belkin or some other reputable company. You should have at least 2 lengths of network cable.

If you are making a wired network, you should have enough network cables to connect all the parts of the network. Ideally, you will have done the cabling in such a way as to make it the most useful and convenient for yourself. PC Magazine has an article about wiring your home in the best fashion.

If a wireless network is your goal, make sure that you have wireless adapters for all the computers, printers, data storage devices or any other items that you plan to connect to your LAN (local area network). Check in advance that the type of wireless equipment that you are using for the router matches your adapters.

2. Set up your router - Hardware setup:

* Turn off your modem and your router
* Connect a network cable from an available port on your modem to the internet port (usually colored yellow) on your router
* Connect another cable from an available port on your router to a network port on your main computer
* Power on your modem and wait 30 seconds
* Power on your router and wait a minute

Here is a video of the steps listed above.

Software setup:

If you are setting up a wired network, you are basically finished. The router is designed to work out of the box.

There is one more thing than you should do for both a wired and a wireless network. You should change the router password to a secure, hard to guess password. Don't forget this password because if you do you can get back into the router by resetting it but you will lose any settings that you might have made.

Vista requires the following software setup for a wireless network. Open Set Up a Wireless Router or Access Point by clicking the Start button, clicking Control Panel, clicking Network and Internet, and then clicking Network and Sharing Center. In the left pane, click Set up a connection or network, and then click Set up a wireless router or access point.

A wireless network works by broadcasting and that presents 2 problems. 1 - your friendly neighbors (those with a bit of larceny in their hearts) and drive by people with wireless laptops can use your network bandwidth (capacity or power). This would mean that that movie that you wanted to download will take twice as long since someone else is downloading a rock concert on your line also. 2 - Your transmissions are available for hackers to intercept and get private information. To prevent this you need to encrypt (scramble in code) your data transmissions.

Before you try the next 2 steps, make sure your wireless connection is up and running.

To prevent your becoming the wireless provider for your little part of the world, you want to hide the fact that you are broadcasting.

Change the SSID, the name of your wireless network that your router manufacturer provides by default.

Secure your wireless network by activating encryption. Use Wi-Fi Protected Access (WPA) or better yet WPA2 if your router supports it. If not, use Wireless encryption (WEP). For most routers, you will provide a passphrase (a secret sentence) that your router uses to generate several keys. Make sure your passphrase is unique and long.

Click the link for details of doing this for Linksys.

3. Connect a network client such as a computer or printer - For a wired network this means running a network cable from one of the router ports to the network connector of the computer. For a wireless connection, this means making sure that the computer or printer has a network adapter. (If the printer is connected to a computer and the computer is sharing the printer it doesn't need its own adapter.) If it doesn't, install one.

4. Do the software set up of the client - If you have installed a network adapter, install the software that comes with it. For XP, run the Network Wizard. Here is a detailed description of using the wizard.

For Vista, if you have a wireless network, you must first run the Set Up a Wireless Router or Access Point wizard on at least one computer on your network before following these steps.

The procedure consists of 2 steps. 1 Make sure that the workgroup name matches the workgroup name of the main computer. The default name for Vista is WORKGROUP. For XP it is MSHOME. All the computers on the network must use the same workgroup name. 2 For wireless, select the wireless network and provide any needed password. Check that the connection worked.

To manually add a wireless computer running Windows XP

1. Log on to the computer as an administrator
2. Click Start, right-click My Computer, and then click Properties
3. Click the Computer Name tab, and then click Change
4. If the workgroup name is not WORKGROUP, change the name to WORKGROUP, and then click OK. Otherwise, click Cancel to close the Computer Name Changes dialog box. Note: If you have to change the workgroup name, you will be prompted to restart your computer. Restart the computer, and then continue with the steps below
5. Click Start, click Control Panel, click Network and Internet Connections, and then click Network Connections
6. Click the wireless network connection icon, and then, under Network Tasks, click View available wireless networks.
7. Choose the wireless network from the list that appears, and then click Connect

To add a wired (Ethernet) computer running Windows Vista To confirm that you added the computer, do the following:

Open Network by clicking the Start button Picture of the Start button, and then clicking Network.

You should see icons for the computer you added and for the other computers and devices that are part of the network.

To add a wired (Ethernet) computer running Windows XP

1. Log on to the computer as an administrator
2. Click Start, right-click My Computer, and then click Properties
3. Click the Computer Name tab, and then click Change
4. If the workgroup name is not WORKGROUP, change the name to WORKGROUP, and then click OK

Easy Steps to Reformat Your Computer (Windows XP as an OS)


Have you ever experienced installing all the softwares needed to secure your computer from worms, trojans and viruses? Isn't frustrating to know that you've invested much effort but the damage is irreversible? Is your computer working too slow that it came to a point that you want to throw it outside your window? Generally, not all of us know how to troubleshoot on certain areas, especially those which are difficult to resolve. And your last resort??? REFORMAT!

FULL REFORMATTING - earases and clears everything in the hard disk, checks and marks the bad sectors, and installs a new copy of an operating system. It will refresh your hard disk by getting rid of old datas, unused folders, and left over files. Before reformatting, make sure to back up every important files that you need, especially those in "MY DOCUMENTS".

MUST HAVE:

1. Windows operating system installation disc with CD-KEY

2. Device Drivers

3. Antivirus and other Software Installers

NOTE: If you accidentally thrown or misplaced any of those, the alternative is to download the driver/software installers in the internet. You can either go to the manufacturers' website or search for the installer on search engines if you exaclty know the model or type of installer needed.

In case you didn't know the brand/type of hardwares in you computer, you can check it by using SYSEM INFORMATION utility by:

1. click Start > All programs > Accessories > System Tools > System Information

2. Explore and identify the devices and download the needed installers.

3. Transfer the installers to a removable disk.


HOW TO REFORMAT YOU COMPUTER (windows XP)

1. Set to boot from CDROM

a. restart the computer

b. Hit f8 (to go to Boot menu) or DEL key (required to enter the BIOS)

c. In the BIOS menu, enter the Boot Sequence from the Advanced BIOS option

d. Select CD ROM to be your primary Bootup device

e. Save Setting and Exit BIOS. Restart

NOTE: Make sure that the OPERATING SYSTEM CD (windows XP) is inserted.

2. After restarting, a prompt will ask you to hit any key to boot from CD.

3. You will see a blue screen which indicates the loading of XP setup from the CD.

4. Hit ENTER to set up Windows XP

5. Hit F8 to agree to the EULA

6. Select the drive on where to install WINDOWS XP

7. Select Format the partition using NTFS File System (Quick)

8. System will then format the partition and installation filles will be copied. This may take longer depending on the size of your disk.

9. System will Reboot and the Setup begins.

10. Regional and Language Options will prompt. Select the preferred setting and click NEXT.

11. Name and Organization will appear, Provide the data needed. click NEXT

12. Enter your Windows XP CD-Key. (This key is usually attached with the CD jewel case or license) Click NEXT.

13. Enter Computer Name. Click Next

14. Configure your date and time setting. Click NEXT

15. Select Typical Setting, Click NEXT

16. Wait until Windows XP setup finishes the installation.

17. Your almost done, Windows XP starts. Install the drivers and softwares needed by your computer.

18. CONGRATULATIONS! You were able to reformat your own computer ^_^

Popular Posts